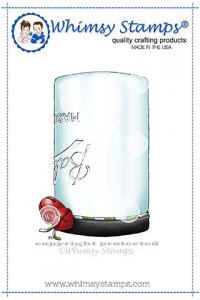
I squealed with delight when I saw this stamp being released through Whimsy Stamps. Do you know how many things you can put in a jar and turn it into a snow globe? It doesn’t even matter what the season! This amazing illustration by Barb Sproatmeyer snagged my attention right away and is now available through Whimsy Stamps. YES! Barb Sproatmeyer has joined the team of illustrators and I am so beyond thrilled. Fab things happening behind the scenes and for all you LMM fans get ready for some fun!
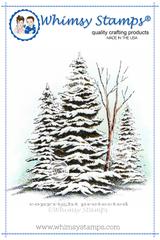
I wanted to create a snow globe effect with this Mason Jar rubber stamp and thought the Winter Pines would be perfect. Simple and clean.
Thoughts within this Card
When I created this card I wasn’t sure the final direction I was heading with it. I knew I wanted to do the Mason Jar, and knew what I wanted in it. The final card design was not yet created in my head. So you could say I was on a coloring journey. I stamped the jar and then masked the edges, just in case my inside stamp overlapped the outer edge and bells at all. After stamping the inside with Winter Pines I colored it. Now came the extra fun part…making it look like it wasn’t flat.
Leaving the edges of the jar lighter and working my way in I added some cool grays. I did what you are NOT supposed to do and even colored over the white gel pen snow. It’s bad on the nibs, and you might have to replace it later as the nibs soaks up the water based white paint, but worth it in the long run. After I chose the highlighted areas and colored around them as much as possible it was time to add the white highlights.
In order to add the white highlight I prefer to use colored pencils. Unfortunately mine are all packed and not easy to get to so I grabbed a white gel pen and started adding white long vertical strokes over the actual image. This give the appearance that the image is behind the class surface.
This was just for fun coloring, so I tried not to overthink it or overwork it.
After the image was all done and I decided that it needed a fairy or something on the outside of the jar. The just released Snowflake Fairy Princess fit my idea perfectly! Did you know Whimsy sells digital stamps too? If you prefer working with digitals you must check out the collection of ones available HERE.
Creating this Card
Keeping with the simple and clean look all I did was hand cut out the jar and pop it up on some light pattern paper. I could have just added a simple sentiment and been on my way but instead I popped up the sweet fairy in the upper corner, blowing snow-kisses. She balanced out the bells in the lower corner on the left. Done…and Done!
Oh, oh, oh!!! I just had an idea…create a summer or spring theme…cover up the bells with a fun die cut piece. Capture the Easter Bunny. Capture a Santa or the Reindeers. Fill it with bugs. Oh the possibilities are sooooo endless!
I hope you enjoy this Mason Jar as much as I do!!


Snowflake Fairy Princess DIGITAL stamp

Copic Markers:
Fairy –
E50 E51 E53 E55 R11
YG11 YG03 YG67
R000 R00 R01
E42 E43 E44
Jar/Scene –
B0000 B000 Boo
C1 C3 C5 C7 C10
YG03 YG61 YG63
E40 E43


Wow! What a great card front Jennifer! I love it!
oooh fireflies
I saw your card creation on the Whimsy site and it is so fabulous that I decided that I had to get this mason jar too! I really like your card and I think you did a fabulous job! Super creative and such a great snow globe scene with the fairy! LOVE IT!!!!
Fabulous card Jenn! Still daydreaming about the lovely time I had at boot camp and finally getting Barbara to join in the fun! Hoping she will join me next year too! Happy Thanksgiving to you and yours! 🙂