Behind the Scenes – Coloring the background
I get asked all the time what to do with the
background. Most of us color on white
compatible cardstock and we don’t want our images to look like they are
“hanging out”. I tell my students all
the time “at least ground your image”.
What does this mean? This means
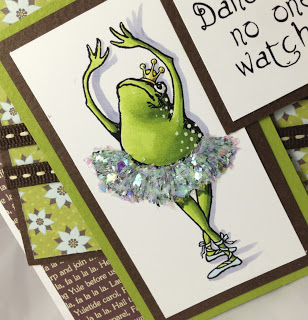
you need to add a shadow under the object. When doing this, the image is no
longer “floating”. In this article I
will show you some samples and talk a little about options for the backgrounds
as well as grounding your image.
A simple shadow “under foot” or beneath an object usually
does the trick. It is important to
determine where your light source is coming from so you can add the shadow
going in the correct direction. A simple
flick of the marker where you want the shadow is sufficient to achieve the
“grounded” look. Very little color goes
a long way, as you do not want to distract from the image, rather add to
it. When adding this shadow I prefer to
use a neutral tone. Of course you can
use any color that makes you happy.
We can take this a step further by coloring the
background. There are many ways to
achieve this.
background. There are many ways to
achieve this.
1 1)
Airbrushing
with the Copic system is a simple way to create a background. You will most likely have to mask off your
image as to avoid overspray onto the image.
It is recommended that you airbrush before you color the image. You can take this a step further by texturing
the background using a rag and your blending solution (as talked about in the
March issue of Paper and Pixels). I love
this look. If you don’t have the
airbrushing system there are plenty of other fun things to try.
1 2) Stippling has a very nice look. Gather 2 or more markers that are
complimentary. You are going to create a
background using a lot of little dots.
The dots will touch each other closest to the image and will have the
scattered look furthest from the image.
The size of the dot will be smallest farthest from the image as
well. Practice with your colors on a
piece of paper to make sure you are achieving the right color combination
before you attempt this on your actual piece.
This technique can be done before or after you color your image.
3) Coloring with texturing is a simple and quick method but you want to do
it prior to coloring the actual
image. The blending solution will erase
your beautiful work if you have already colored your image and then decide to
texture (unless you are VERY careful).
Lighter colors in the 0 or 1 are easier to texture. I usually color around the image and then
flick out with my marker. This will
allow the darkest area to remain around the image. Using a texture rag you will texture the
outside area, or edges of the background.
My favorite texture rag for backgrounds is burlap. Keep texturing the edges until they feather
into the white background with a smooth transition. You can also leave the image background just
colored without the texture.
4) Placing a
shadow is a quick and easy method. Similar
to “grounding” your image. You will
place a shadow on the side that is furthest from the light source. I recommend that you do not place the shadow
all the way around the image as this frames it in, taking the attention away
from your image.
shadow is a quick and easy method. Similar
to “grounding” your image. You will
place a shadow on the side that is furthest from the light source. I recommend that you do not place the shadow
all the way around the image as this frames it in, taking the attention away
from your image.
5) Using a
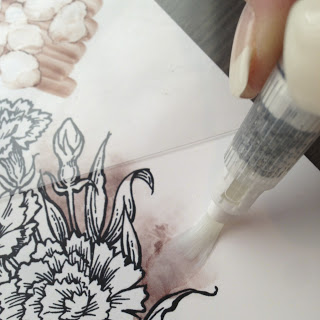
water brush and texturing is a favorite of mine. Make sure you do this prior to coloring. Take a water brush and fill it with blending
solution. Color using your marker on a
slick surface such as acetate. This will
be your palette. You can scribble
various colors if you want your background to be colorful. Remember that blending solution has a
tendency to lighten; you may want mid-tone colors for this technique. Using your water brush pick up a small amount
of ink off the palette and color around the image. You should always start your water brush
coloring closest to the image lines and then push with the water brush
outwards. This will help give the ink a
feathered look. Pick up more ink off the
palette and repeat this step until you have the desired amount of ink around
your image. Using a texture rag and
solution texture the areas you places the ink.
Burlap and Blending Solution
Marker placed on acetate as palette
Place a generous amount of ink on the brush tip
Use a smoosh and pull motion from image out. and repeat.
Using texture rag and blending solution remove some of the ink
(hold on one spot for 3 seconds and repeat)
All images in this tutorial are from Stampendous!
I hope you enjoyed the information on backgrounds. Now it is your time to try.
Jennifer Dove
http://just4funcrafts.blogspot.com


Awesome tutorial!
Hugz,
Gramma
This is FANTASTIC!!!!! Thank you!
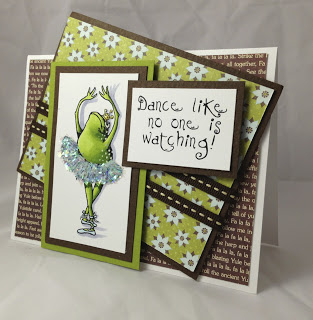
I can never learn too much about my copics!! I have pinned these tutorials to my pinterest page on copics also. Thank you soo much. Love the burlap idea, it has been sitting in my drawer (ugh) and just love how you shadowed around your ballerina frog. Also, great info on coloring background first.. I have had hair colors and those "dreaded reds" pulled right off the image when I tried to do background AFTER I colored… thanks again. – Ann Marie (My Eclectic Spirit)
I need to try this…thanks for such a clear explaination!
Wonderful coloring & shading. Can you please tell me what kind of pen you are using please? It doesn't look like a copic, more like an aqua painter.
Thanks for sharing,
Great tutorial! Pinning it x