I have been a fan of the images from Beccy’s Place Blog for a while and decided I would use one of her images for a tutorial. You can go HERE and download the image for free and follow along. Beccy is so sweet to offer her amazing images for your coloring pleasure. So get your image and grab your Copics and lets have some fun!
Be sure to print the image on Copic compatible paper, and I recommend you use laser printer so the ink doesn’t smear when you color over the lines. But if you dont have this then you can still play just know you might not get the same results.
Grab your Copics: YG67, YG63, YG03, E57, E35, E33, R59, R46, R35, 0
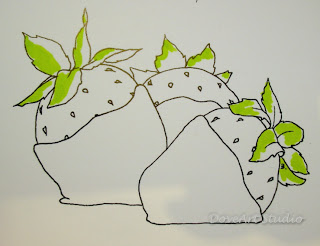
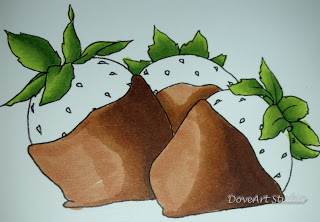
Using your YG03 I like to color the spot that I want highlighted. This gives me a point of reference.
Add YG67 to the area you wish to have the shadows.
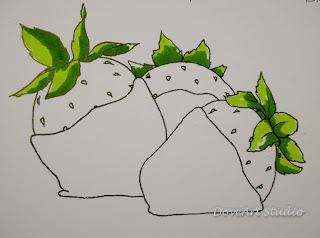
Next you will use YG63 and slightly overlapping the darkest (YG67) color in small circles until they are blended.
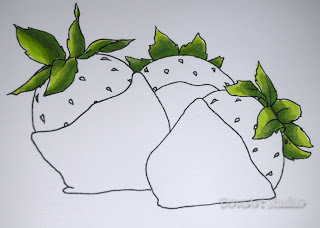
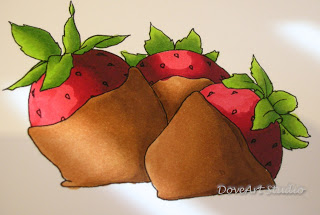
Bring back in the YG03 over all leaf to blend and make it pop. Don’t over do it or you will need to bring the darkest shade back in again.
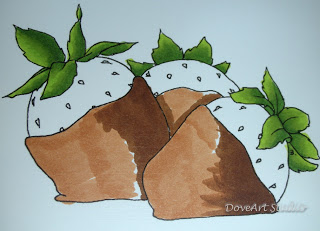
Now we will work on the chocolate. Using E33 I color the area I wish to be the lightest so I have reference. You can color each section separate to keep the paper moist as you work rather then all 3 sections at once, but i am doing this as reference so you can visually see it.
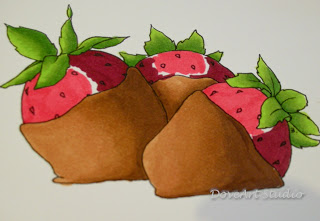
Get your E57 and color the area you wish to have as the shadow
Using the medium brown tone E35 soften the dark line and work your way outward
bring back in the lightest E33 to smooth out the medium tone and feather into the area that is going to remain light.
It’s time for reds….Grab the E35 and color the portion that you wish to have as the highlighted area
Now add in your shadow with the R59
And to blend it add the R46 to smooth the R59 out…
And finish it off by smoothing them all out with the R35 again
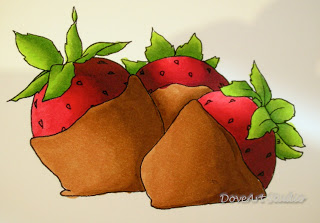
Lastly…yup, we are almost done…
I added some deep shadows under a few of the leaves with the R59 and used the Blender pen (0) to remove some of the ink for shiny highlights. I used W3 to put a shadow under the strawberries to finish it off.
Thank you for playing along. I would love to see what you have done with this image/coloring as I am sure Beccy would too. See you again soon with some more FUN!
Jenn Dove






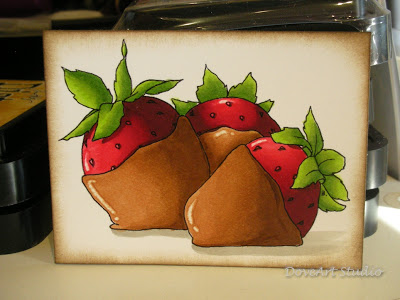

What an absolutely fantastic tutorial Jenny, your strawberries are awesome! I love the way you use your copics… I think I'm going to give your method a try and see what I come up with. You really get a beautiful contrast between light and dark. Thanks for the tutorial.
Cheers,
Beccy
Fab tutorial Jenny – thank you
What a great way to start the month YUMMO!
mmmmm yummy.
Great tutorial.
Thank you so much for your fabulous tutorial! I've admired your coloring for a long time. It's great to see how it's done by a master:-)Would you please consider doing more of these?
I will do more tutorials soon….working on a few classes first 🙂 I would love to see links to your work 🙂 when your done
Wonderful tutorial. I followed it last night with the colors I had and this is the first time I can really say the shading and blending "clicked" in my coloring. Can't wait for your book to come out via download.
Thank you for the tutorial. It was great to see the method that you used to create shiny highlights and shadows.
When is your book going to be released?
I am currently working on the local classes with the book. I want to make sure it all is just right. once they are done I will concentrate on the book. I want it to be perfect. stay a follower and i will keep you all updated.
this is amazing. I could swear I could pick up one of those berries and taste smooth yummy chocolate!
LOVE the tutorials – please keep them coming!!
Thanks for the tutorial! I've been doing it wrong, way wrong. Please keep them coming and I'm going to go try this right now!
I promise you I will practice,practice,practice these strawberries!
Thanks for the tutorial, this was fun! I recently discovered your blog and love it! I'm in Arizona too 🙂
Best Copic tutorial that I've seen yet. I want to make the 2hr. trip to buy the Copics you used right now!